I posted this on the VC blog I'm a design team member for, but I thought some of you might benefit from it too. I love this technique: it's so fun and easy!
Supplies:
Toothbrush with straight bristles (you can trim them if need be)
Chocolate, Bamboo or Cocoa re-inker
Paper Plate
Bamboo cardstock
Black ink pen
Steps:
1) Cut a piece of bamboo cardstock (or any light color). I actually use a 12 x 12 or 8 1/2 x 11 and cut it up for multiple projects
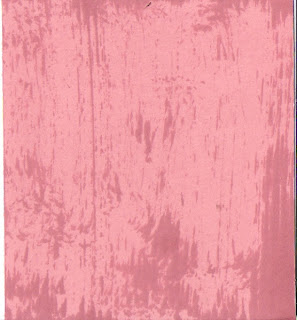
2)Squeeze chocolate and/or bamboo re-inkers onto a flat surface (plate) and dip the toothbrush and swipe it across the paper. You may want to blot on side of the plate or a paper towel before swiping on paper, so you don't end up with a big blob.
3) I did all mine with just Chocolate. If you want more shading, you can add Bamboo as well. First swipe the dark color and add swipes of the light color.

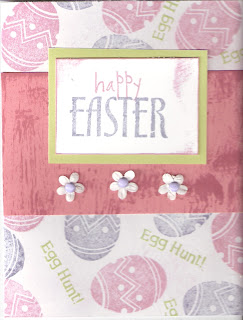
**at this point you have a fun background by itself--I like using this with tone on tone, as in the Easter card here

4) Using a ruler and a black marker, add 1" stripes and then randomly add a horizontal line. Add dots above and below the horizontal line.

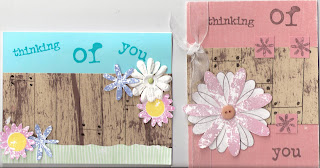
Viola! You have faux wood. I love that this technique can be masculine or feminine depending on how you use it.
A couple more cards:


11 comments:
WOW!!! That is a really cool technique - and easy too!!! I'm going to have to try it!!!! Thanks for the tutorial!!!!
Your fellow SBS4 sister, Chris
Neat! What a fun technique and you make a great tutorial!
wow, I love this technique, certainly will try it later.
I love these cards. I've seen them in browns but never in pink and I LOVE it!!!! Awesome!!
OMG NIC! THANX FOR THE TUTORIAL!AWESOME CARDS!
Wow, thanks for sharing! Love how you were also able to show it used on feminine cards.
Jane
SBS4
Fantastic technique, looks great, thanks for sharing!
Your picture tutorial ROCKS!! I've heard of this before, but have never tried it. LOVE it in the blush :) Love the texture it gives...an interesting background. THANKS for sharing! :)
Very cool technique. I need to try this one thanks for the instructions.
great technique...I may just have to pull this one out for the next hostess meeting.
Ooh ooh, the next time Blake gives me a free hand I think I am going to have to give this a shot!
Post a Comment